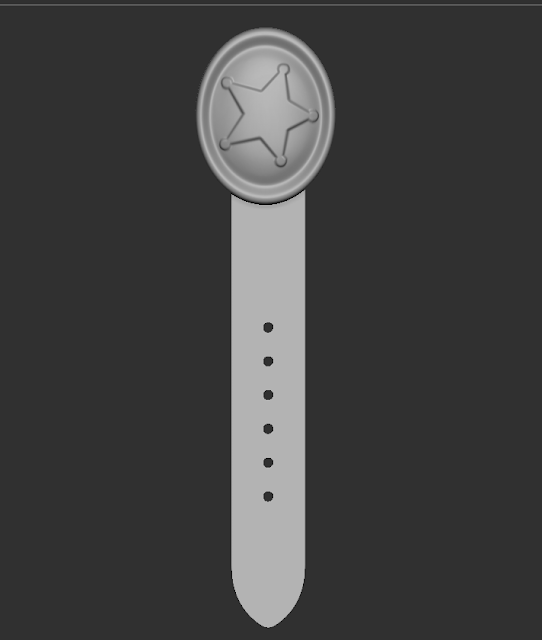
In this tutorial I will show you how to take a leather belt
mesh and build a tri-part Insert Mesh Brush. Ill append the newly created brush to
an existing insert mesh leather belt brush that I created a earlier. I have chosen to create a tutorial about this
topic because It has been very useful in creating clean and consistence shaped
belts that helped to add clean details to my finished sculpts.
Part 1 Build Leather Belt Mesh.
To build the belt mesh you can really use any software. The only import parts to remember is that you
need to have a beginning, middle and end section of your mesh. For my belt the buckle will act as the beginning,
the leather strapping will acted as middle and rounded end with holes will
acted as the end. Things to avoid when
creating the mesh is heavy sub divisions.
Use enough division to make the mesh look smooth; if you find that your
mesh is in the million polygon range before making it a brush; the polycount is
too high.
Part 2 Split the Belt in to Polygroups
Now that the mesh is ready we have to separate the 3 sections
(Buckle. Belt and Belt End) into different Polygroups. I found that starting with the middle section
and masking it and using the group by mask is easiest place to start sectioning out
the mesh into different polygroups. To
create a Tri Parts brush there must be three separate Polygroups.
Part 3 Orienting the Camera.
This step is super easy, just rotate the cameras so that the
beginning mesh shape is positioned towards the top and end of the mesh is
located at the bottom of the screen. If you hold down shift while rotating the
camera you can snap to the different orthographic view in Zbrush.
Part 4 Building the Brush.
Now it’s time to make the brush. Start by clicking on the brush pallet and
click Create Insert Mesh. After clicking
the button it will ask you if you want to append this brush to an existing
brush or make a new brush. If you have
never made an insert mesh brush you would want to click new. Since I already have an Insert Mesh Brush for
leather belts I’ll click append and select the brush I would like to append it
to.
Part 5 Changing the Stroke to Curve Mode
If you tried to use the brush right now, the result would
quite be what we wanted. We need to
change a setting in the stroke pallet.
We need the brush to use a curve so that we can drag a path for the
brush to use. You can find this option
under the stroke pallet in a sub-pallet called curve. Click on “Curve Mode”.
Part 6 Final Adjustments.
In the brush pallet we need to turn on the Tri Parts feature. The Tri Parts feature will allow
the brush to identify the beginning, the middle and the end. The middle section will be repeated throughout
the curve while the beginning and the end will only be used once. The last setting we need to turn on is Weld Points. This setting will make sure the
belt is one continues mesh. If you find
that the brush look a little jagged you can increase the Curve Resolution in
the brush modifiers. For the belt I increased
the curve resolution to four.
Finish by saving the brush.
There are many different types of leather belts you could create and
store in one single insert mesh brush. In the image above I used two separate
insert mesh brushes to create the cowboy bullet belt.


No comments:
Post a Comment